Setting up the Kosmos App
When the Kosmos app must be installed, use these instructions to help get it up and running as quickly as possible.
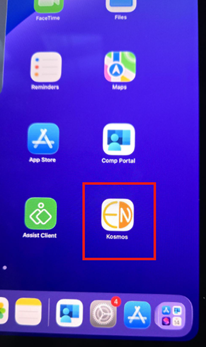
After the Kosmos app has installed, select the app from the screen:
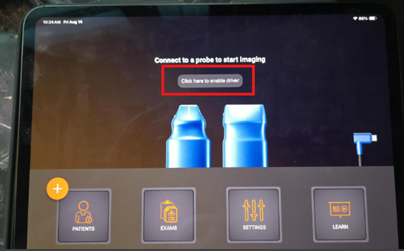
On the next screen, select “Click here to enable driver”:
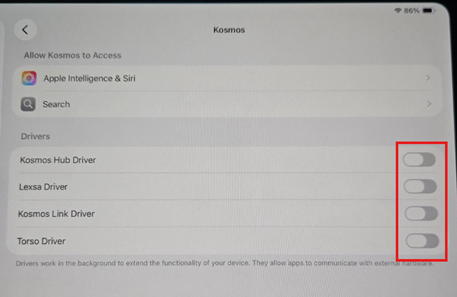
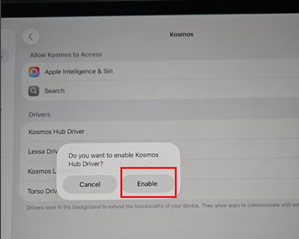
On this screen, there will typically be four (4) drivers that should be enabled for the probes. There will be a pop up for each one asking you to confirm, and then it should all show green for “On” when you are done:
Pop up and final setup:
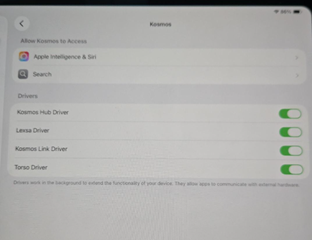
Once all drivers show green, return to the Kosmos app to set up the DICOM profile.
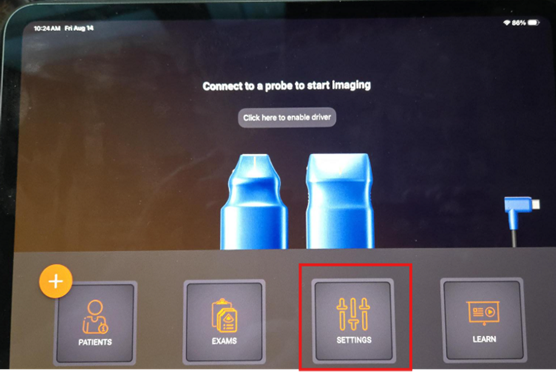
From the Kosmos app home screen, navigate to Settings, then select DICOM:
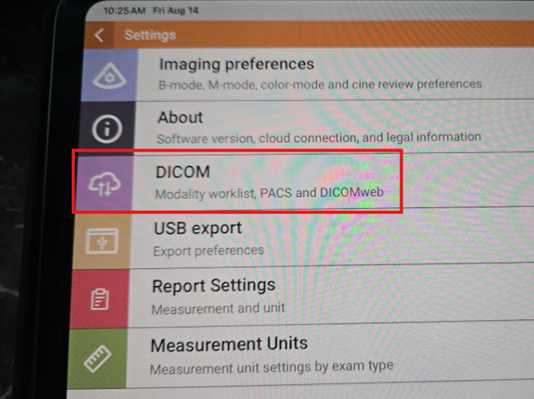
Select PACS archive here, then + Add Profile on the next screen:
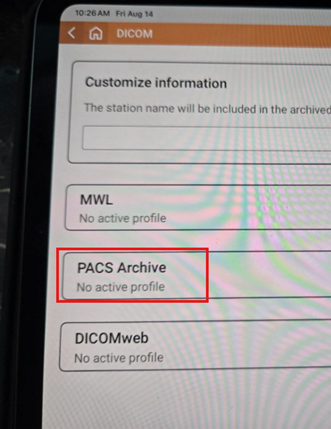
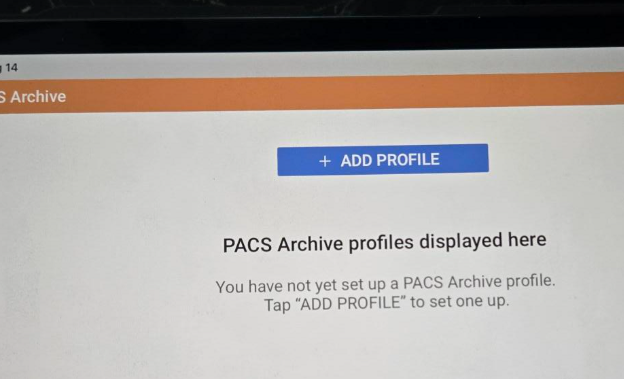
The page will look like this, so we need to fill it out!
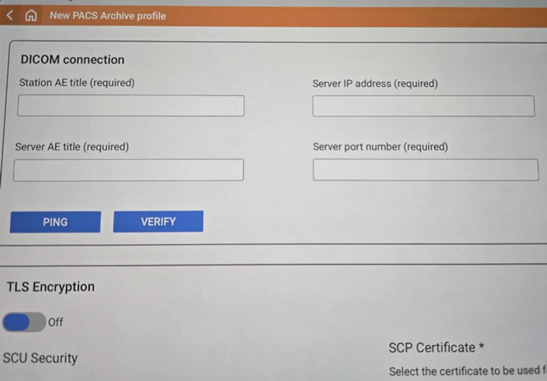
Enter the following information in the blanks above:
Station AE title: Enter a unique device identifier (e.g., ipad1 or ipad2). Each device used with the Kosmos app should have a distinct Station AE title.
Server AE title: coregateway
Server Port Number: 10104
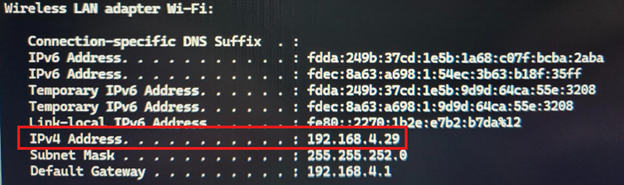
Server IP Address: should be the IP address for the laptop you are sending the study to. See steps below on how to find that.
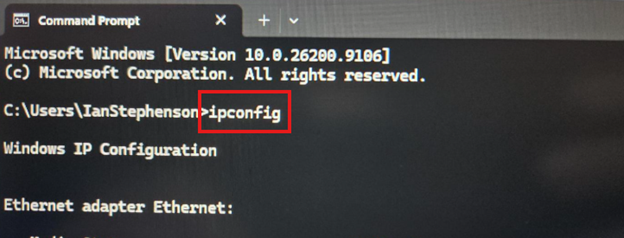
To find your IP address, go to the search bar at the bottom of the laptop and type in Command Prompt, then open that app. Once it opens, type ipconfig and press enter, then scroll down to find the IPv4 address listed there. Put that in the SERVER IP ADDRESS blank on the Kosmos app.
The DICOM profile should look like this now:
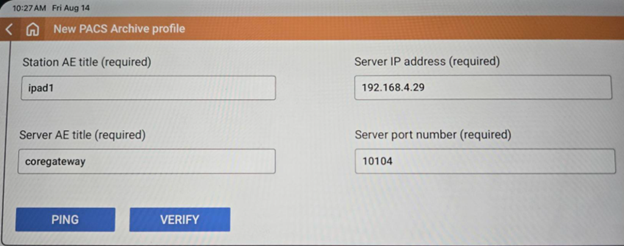
Now scroll down on that page and make the profile nickname coregateway and then make sure the three (3) boxes on the right are checked:
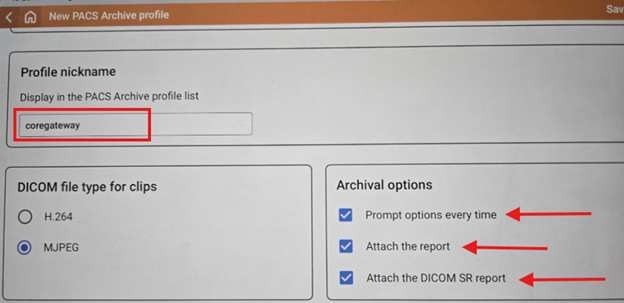
That is all the information you need to enter! Now scroll back to the top and hit the blue VERIFY button.
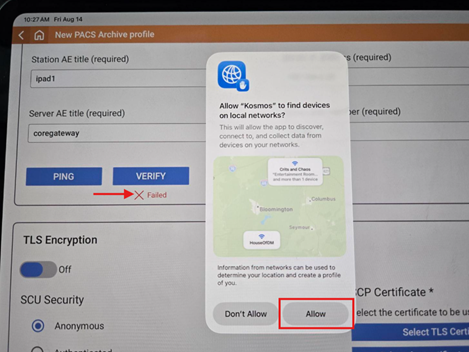
⚠️ Important: The verification will fail on the first attempt. This is expected behavior — see the next step.
There should be a pop-up on the screen asking you to allow access to the local network. You will need to hit ALLOW on that pop up. Once you do that, hit the VERIFY button again and after a few seconds you should see a SUCCESS message!
Pop-up after failure:
After hitting Allow, select Verify again to see Success:
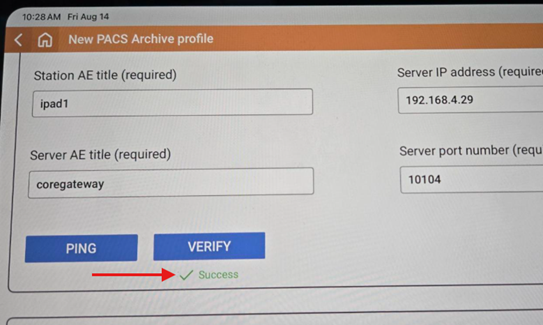
Just make sure you hit this SAVE button in the top right corner and the profile will now stay on the app and you should be good to go!

If you have any questions or issues when doing the setup, please don’t hesitate to contact the Clinic Support team and/or the IT Support team.